
ServerAdmin User Guide
Download the current version: ServerAdmin.zip.
1. Purpose
ServerAdmin manages Proxmox servers and Windows virtual machines from one Windows desktop application. It provides:
- Saved Proxmox server connections.
- VM start, stop, pause, resume, reboot, reset, and delete actions.
- Embedded and detachable noVNC consoles.
- DevOpsTasks agent installation.
- PowerShell command and script execution.
- File transfer to Windows VMs.
- An optional authenticated web interface.
- Automatic application updates.
2. Requirements
- Windows 10 or Windows 11.
- Microsoft Edge WebView2 Runtime.
- Network access to each Proxmox host.
- Pageant with an authorized SSH private key loaded.
- QEMU Guest Agent installed and running in Windows VMs used with DevOpsTasks.
The Proxmox SSH account must be allowed to run the required qm and pvesh commands. Administrative operations normally require the root account.
3. First Start
- Extract the complete
ServerAdmindirectory. - Start
ServerAdmin.exe. - If Pageant contains several keys, open
Settings > Pageant keys.... - Select the SSH key used for Proxmox and DevOpsTasks. When Pageant contains
- Open
Settings > Application settings.... - Configure the web interface or disable it when it is not required.
exactly one key, ServerAdmin selects and saves it automatically.
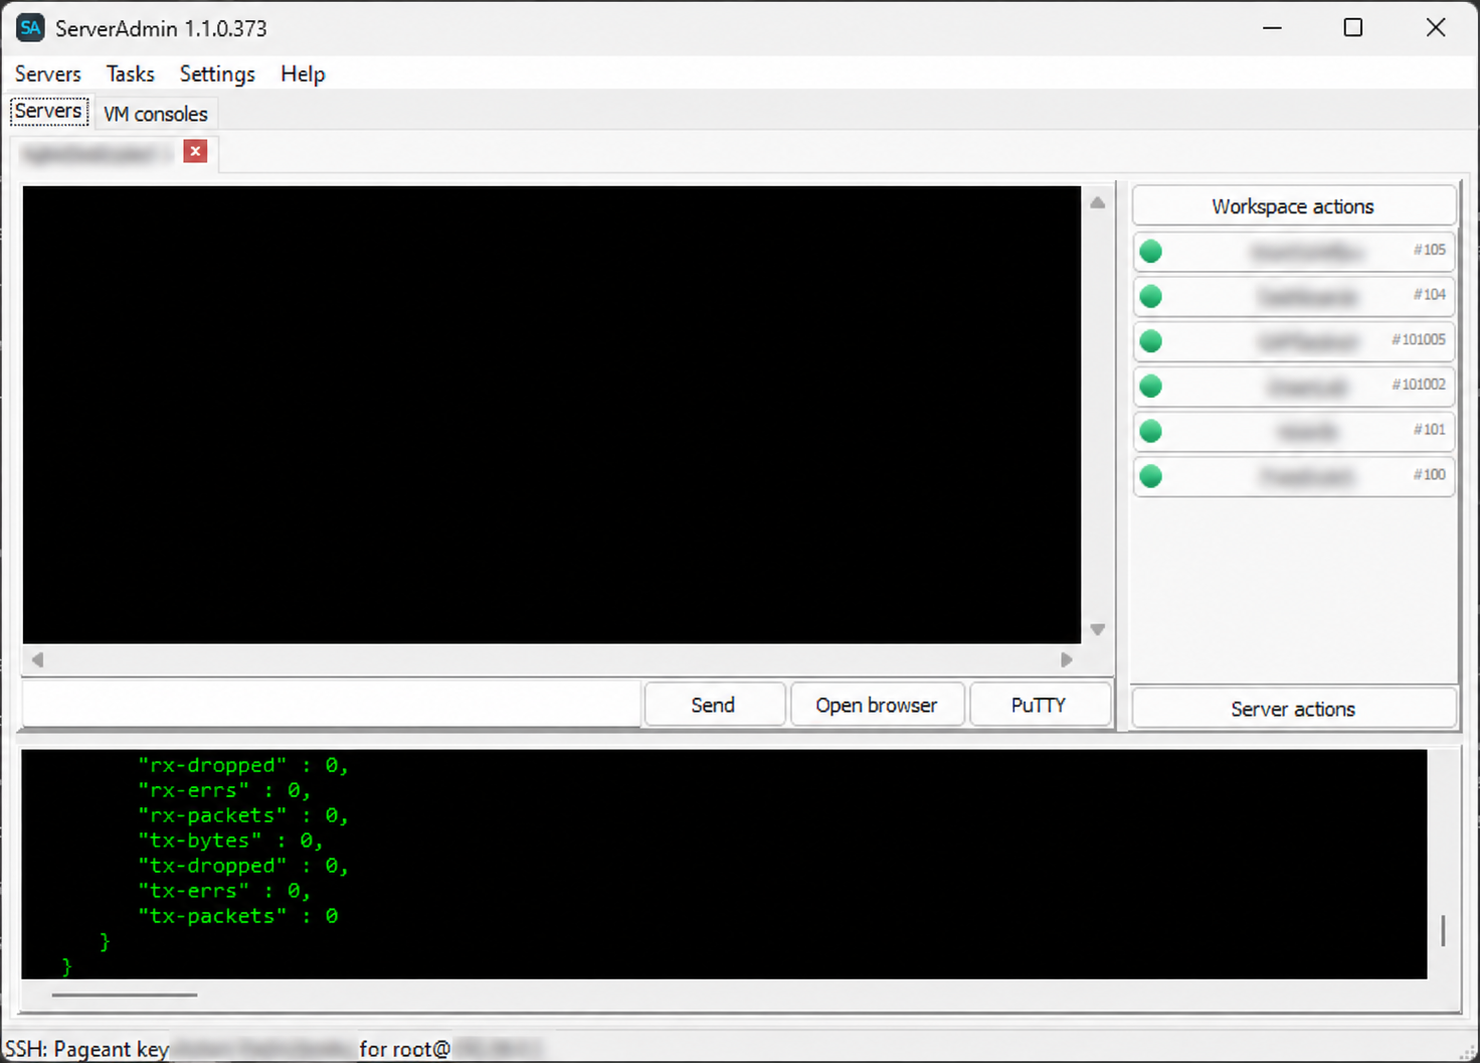
The main window title displays the exact version of the running ServerAdmin executable.
Open Help > User guide in the desktop application to open the autonomous HTML guide included in the ServerAdmin directory. In the Web interface, select Help. Use the Russian and English switch at the top of the guide. The documentation does not require Internet access.
Interface language
All menu, button, field, tab, and other interface labels in this guide use their English captions, regardless of the selected interface language.
The Desktop and Web interfaces support English and Russian without restarting. Russian is selected by default in a clean distribution. In Desktop, use Settings > Language > English/Russian. The selection is stored in conf\SASettings.ini and applies to newly opened forms. In Web, use the RU or EN button in the top bar. The Web choice is stored in the current browser.
Do not move only ServerAdmin.exe. Keep the agent, conf, and web directories, WebView2Loader.dll, ServerAdminPageantBroker.exe, and ServerAdminJobService.exe beside the executable.
ServerAdmin starts the Pageant broker in the current user session and registers a versioned per-user copy for Windows sign-in. Private keys remain inside Pageant. Only SSH-agent identity and signing requests cross the local named pipe. Pageant must remain running with the required key loaded.
The ServerAdminJobService Windows service is optional and disabled by default. Open Settings > Application settings..., enable Use background job service, and select Install service to install it. Select Remove service to stop and remove it. Both operations request Windows administrator approval. The service keeps the web interface and its background jobs available after the desktop application closes. If the desktop currently owns the configured web port, the service automatically starts listening after the desktop closes. It authenticates only through the user-session Pageant broker; no SSH password is copied into the service. The key selected in Settings > Pageant keys... is stored as a public-key identifier so the service can choose the same Pageant identity. The service checks logged-in Windows sessions for pageant.exe. If exactly one eligible user exists, that session is selected automatically and the broker is launched there, including when the workstation is locked. If several users run Pageant, select Pageant user in Application settings; the choice is stored by Windows SID. Refresh users reloads the list. If the selected user signs out or Pageant stops, service SSH jobs wait until that account and Pageant are available again. No broker can be launched when no user is logged in. ServerAdmin uses SSH/Pageant and pvesh as the primary Proxmox management transport in Desktop, Web, and the background service. This includes hardware, task history, monitoring, backup schedules, backup and restore, VM creation, cloning, migration, and task cancellation. These operations do not request the root@pam password while Pageant authentication is available. The Proxmox HTTPS API remains a fallback when SSH/Pageant cannot be used. Saved fallback API passwords are protected with machine-scoped Windows DPAPI. Legacy saved passwords are migrated when ServerAdmin.exe is opened after an update. Adding, cloning, editing, and deleting server definitions in the web interface also remain available while only the background service is running.
Without the service, all desktop and web functions remain available while ServerAdmin.exe is running. Closing the application stops the web interface, background web jobs, and their progress tracking.
4. Proxmox Servers
Add a server
- Open
Servers > Add server.... - Enter a unique server name.
- Enter the Proxmox host or IP address.
- Enter the SSH and Proxmox ports.
- Enter the Proxmox user.
- Save the server.
The optional Group field places the server under a named branch in the Servers menu. Use Servers > Manage groups... to add, rename, or delete groups. Servers and groups are sorted alphabetically. Servers without a group remain directly in the root Servers list. Deleting a group keeps its servers and moves them back to the root list.
Edit or delete a server
Open Servers, select the server, then use Edit... or Delete.... Deleting a server removes its saved definition but does not change the Proxmox host or its VMs.
Open a server
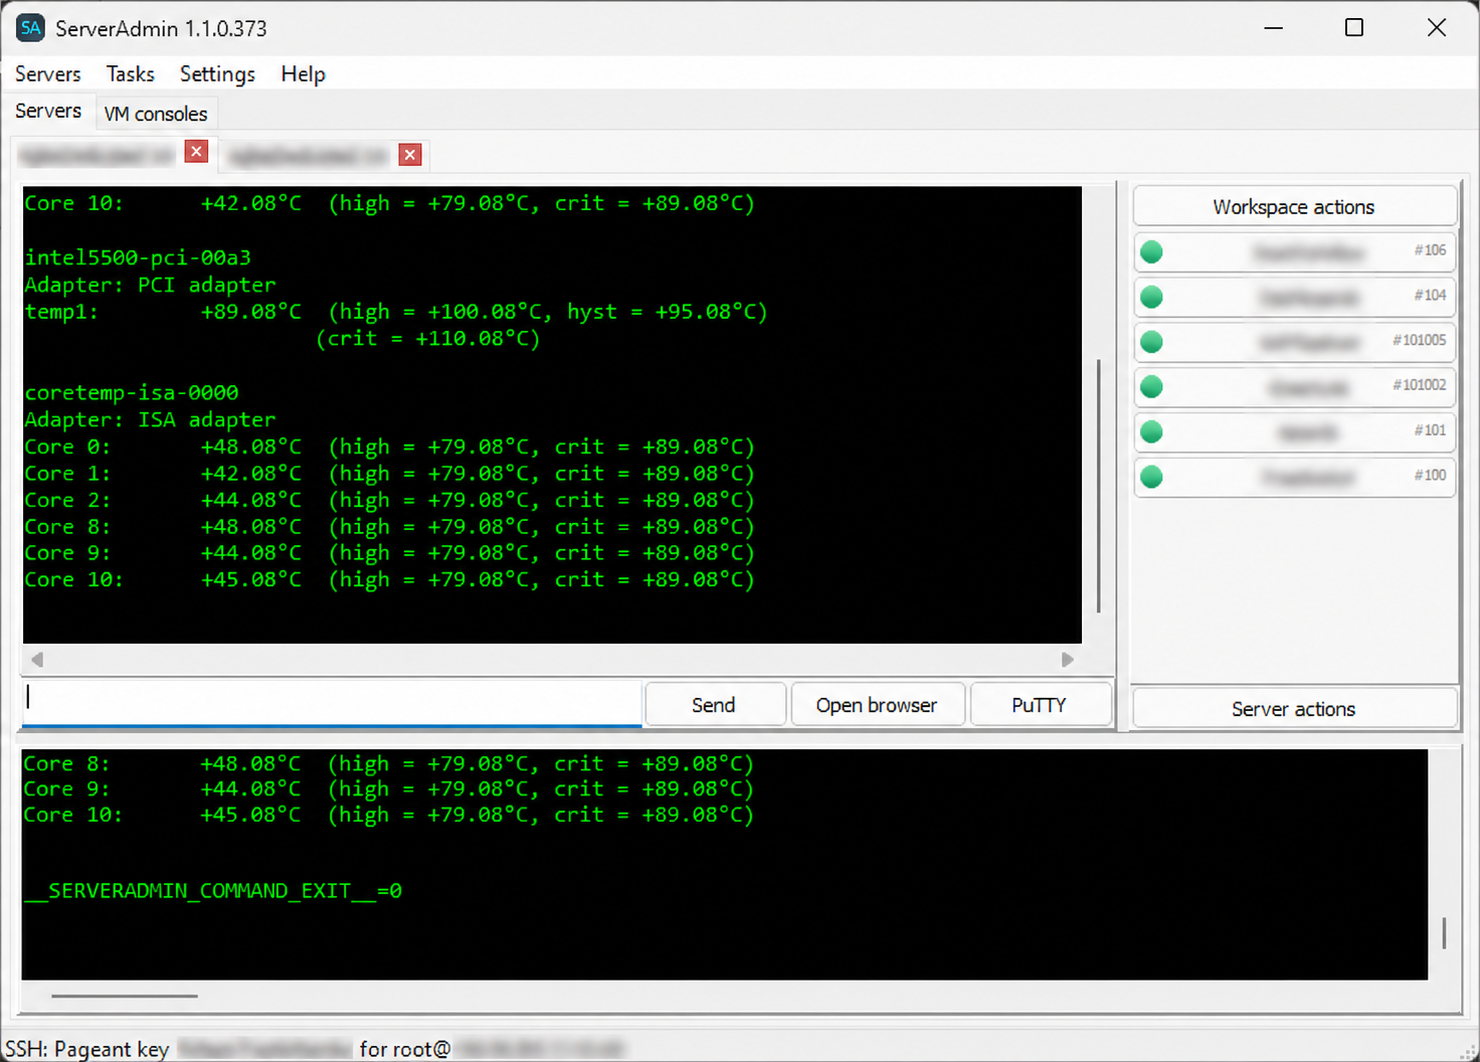
Open Servers and select the server name. Clicking the server executes Open directly; its submenu keeps the clone, edit, and delete commands. ServerAdmin connects through SSH and loads the VM list. If the server has no cached VM inventory, opening it starts the load automatically. Proxmox Backup Server does not start VM inventory loading. Each VM button shows its numeric ID as a small #ID label without increasing the button height.
Use Servers > Search servers and VMs... to open live search results. Search matches server name or IP and cached VM name, ID, configuration IP, or remembered remote-access IP. Selecting a server shows its cached VMs and known addresses in the adjacent panel; the first matching VM is highlighted. Double-click a server result to open it. Search uses local data and does not send a request for every entered character.
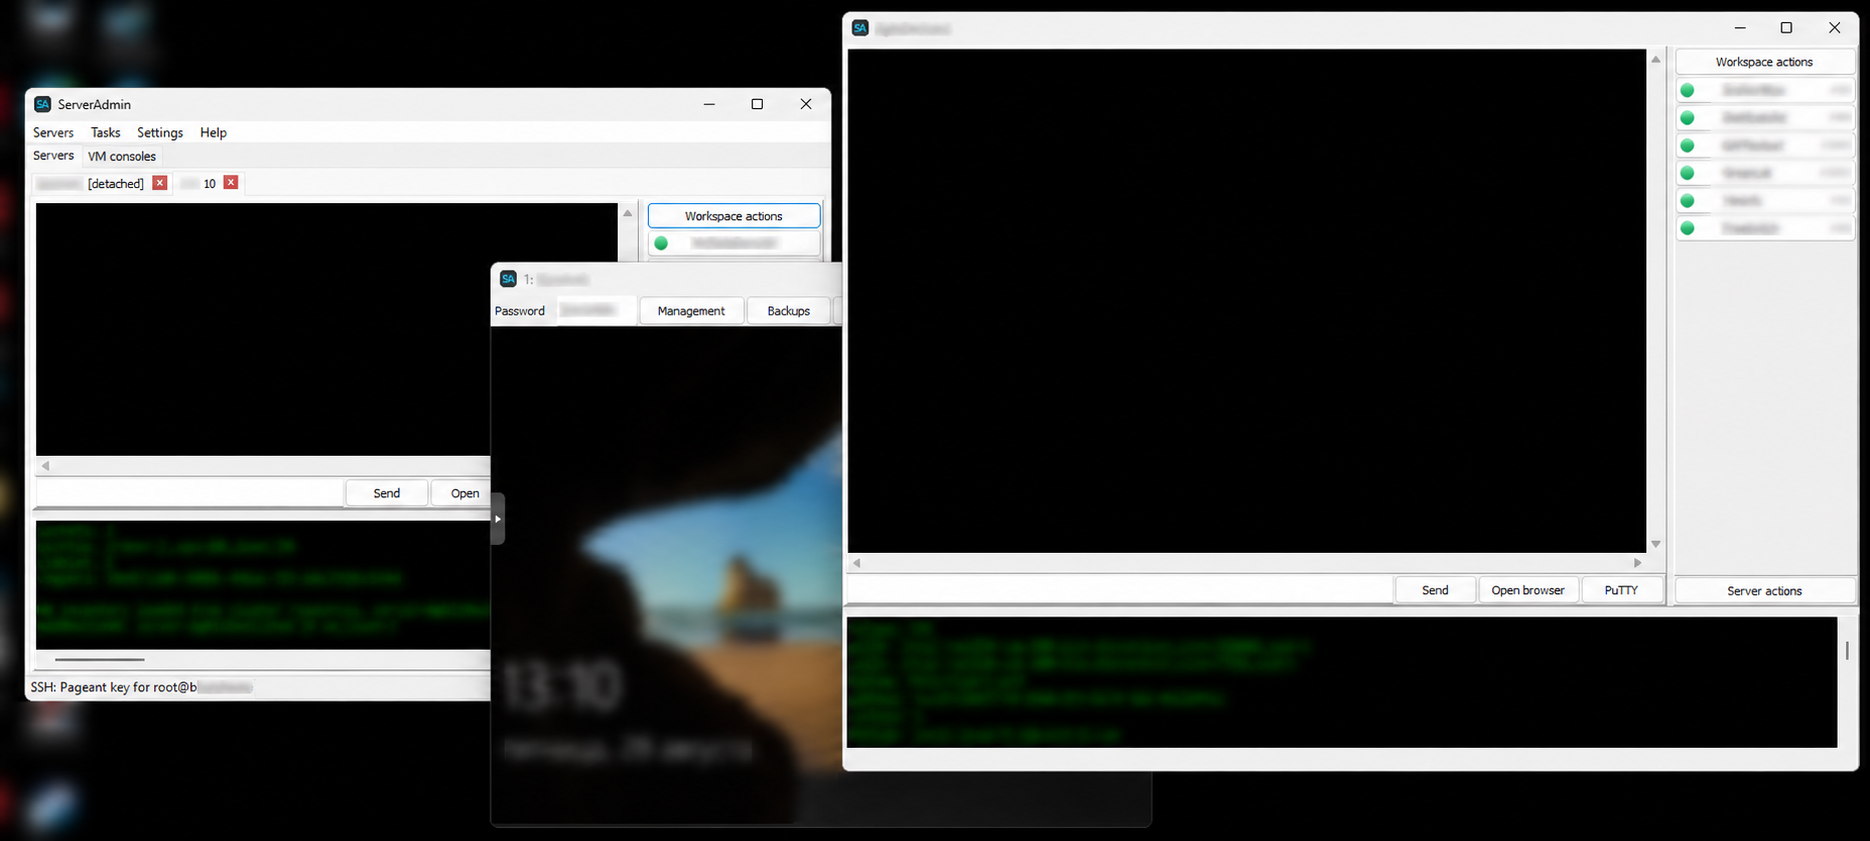
Use Workspace actions for Reload list vm ID, Check State VMs, Detach, and Bulk actions. Detach moves the complete server view into its own window. Return, or closing the detached window, moves it back to its original tab. Each open server can have its own detached window. Select the × at the right edge of an open server workspace or VM console tab to close only that workspace or console. The fixed Servers and VM consoles tabs do not have close buttons. The server PuTTY command starts the packaged clients\ssh\putty.exe; no separately installed PuTTY is required. The adjacent Open browser button opens that server's Proxmox HTTPS address using its configured host and Proxmox port. If no Proxmox password is saved, it offers a masked password field. You can save a nonempty password securely and copy it to the clipboard before opening, or choose Open without password. Selecting Don't ask again while opening without a password suppresses this prompt for that server; it can still be opened without changing the clipboard.
For a selected VM, Remote access > Connection settings... opens its connection settings. Disable session monitoring adds the --disable-session-monitoring DevOpsTasks service parameter; clearing it removes the parameter. Save applies the service command line and immediately requests a DevOpsTasks restart. Existing VM records default to monitoring enabled. While disabled, DevOpsTasks neither monitors RDP sessions nor logs them off automatically.
The same dialog can optionally clear remembered connection data. Select one or more connection types (RDP, VNC, or SSH) and the address or credential data to clear. Remote-client IP addresses are stored separately by protocol; existing shared addresses are migrated when first used.
Open Settings > PBS profiles... to maintain reusable Proxmox Backup Server profiles independently from a PVE server. Profile passwords are stored only with machine-scope Windows DPAPI and are never returned to Web. Use Trust fingerprint... to probe the certificate without credentials, review the SHA-256 fingerprint, and explicitly save trust. Manage associations... can link or unlink one profile from multiple PVE servers.
When Settings > Minimize to tray is enabled, closing the desktop window hides it in the notification area. Starting ServerAdmin again does not open a second desktop instance; the existing hidden, minimized, or background window is restored and brought to the foreground.
Open Server actions > Show list storage to view the selected node's storage in a table. Press Add PBS storage... from that table, choose a saved PBS profile, then press Refresh directories; datastore and namespace values are loaded from the selected PBS server. Discovery runs in the background, rejects repeated starts, and can be canceled safely before closing the dialog. <root> means the datastore root and is sent as an empty namespace. A successful attach links the selected profile to the current PVE. Web lists only profiles associated with the selected PVE and attaches with a profile ID instead of sending its password. If Web cannot confirm the new storage after creation, it reports a warning without retrying the create request.
The Manual mode remains available in Desktop and Web for compatibility. Enter a unique storage ID, PBS host and port, datastore, authentication ID, and password. A named namespace is optional. A saved SHA-256 certificate fingerprint must match before credentials are used; with an empty fingerprint, the certificate must be trusted by Windows. ServerAdmin validates the selected datastore and namespace again, rejects duplicate storage IDs, sends one create request, and reports create and post-create verification failures separately. Existing Proxmox storage is never updated or deleted by this workflow.
Open Server actions > ISO images... in Desktop or ISO images in Web to view ISO files available on the server. Choose an ISO-enabled storage before starting a transfer. Download by URL asks Proxmox to download the image directly with its native download-url task. Upload from PC sends the local file through SSH/SFTP; qm cannot upload ISO files. Web uploads are staged in the Temp\iso_uploads folder and removed after completion or failure. Select an ISO in the catalog and use Delete to remove it from Proxmox storage.
ServerAdmin probes the connected platform. For Proxmox Backup Server, VM inventory, VM checks, bulk VM actions, VM creation, migration, monitoring, and backup-schedule commands are hidden; SSH and server-level actions remain available.
5. VM Management
Select a VM and open its action menu.
VM Consoleopens the noVNC console.Remote accesscontains RDP, VNC, and SSH client actions.Managementcontains lifecycle, hardware editing, and delete actions.Backupscontains backup, restore, and active-task stop actions.Agentcontains DevOpsTasks installation and Windows VM operations.
Destructive commands require confirmation. Confirm the selected server and VM before using hard stop, reset, or delete.
Management > CD/DVD > Insert... loads the server ISO catalog and mounts the selected image. Management > CD/DVD > Eject leaves the virtual CD drive empty. Detached VM consoles expose the same commands. Web VM rows provide a separate CD/DVD button with Insert and Eject actions.
Management > Hardware... in the desktop application edits CPU type, sockets, cores, memory, and minimum balloon memory. The Disks and Network adapters tabs list every supported configured device. Use Add, Edit, or Remove to change devices. New disks require a bus, device number, image storage, and size. Use CD/DVD drive to select the target virtual drive. Select CD/DVD drive installed to add the selected drive. Clear it to remove that selected drive. The CD/DVD image field selects an ISO available on the server; choose <No CD> to keep the installed drive empty. The Web hardware dialog provides the same install/remove control and ISO selection. New CD/DVD drives are added automatically on the first available SCSI device slot. New adapters require a device number, model, and bridge. Enter auto for an automatically generated MAC address. The network adapter list shows whether each configured link is connected or disconnected. Existing disk size can only be increased. For an existing disk, Storage is a drop-down list. Selecting another storage queues a background Proxmox disk-move task; ServerAdmin does not rewrite the volume identifier as ordinary VM configuration text. All changes are submitted together through pvesh over SSH/Pageant when Save is selected. HTTPS API is used only as a fallback.
Removing an attached disk detaches it first, so Proxmox keeps the volume as an unusedN disk. Reopen Hardware, select that unusedN row, and choose Remove to delete the volume and its data permanently. This second operation cannot be undone. Hardware values waiting for a VM shutdown or restart are highlighted in yellow and marked Pending restart in both Desktop and Web.
The CPU list is loaded from the selected Proxmox node and includes default. When a VM has no explicit CPU setting, opening and saving Hardware keeps it at default; ServerAdmin does not write kvm64 unless it is selected explicitly. Selecting default for a VM with an explicit CPU removes that override. The models exposed by Proxmox are available model definitions, not a guarantee that every model is supported by the physical CPU. Use host only when its migration trade-offs are acceptable; use an appropriate generic model for mixed nodes.
Check State VMs reloads both runtime state and the current Proxmox lock. A locked VM is marked in the list as [LOCK: backup] or with another lock type reported by Proxmox.
Create a VM backup
- Select the VM and open
Backups > Create backup.... - Select an enabled Proxmox storage that supports backup content.
- Select
Snapshot,Suspend, orStopmode. - Select
Start backup.
ServerAdmin starts a Proxmox vzdump task and immediately returns control to the application. A separate status-bar field shows task progress until the task finishes. With several active tasks it shows the first two and the count of additional tasks. VM state and its Proxmox lock are refreshed automatically after task start. Backups > Stop active task(s)... queries the live Proxmox task list, so it can stop active backup or restore tasks even when they were started before the current ServerAdmin session.
Restore a VM backup
- Select the target VM and open
Backups > Restore.... - Select backup storage, then select an archive from the detailed list. The
- Select target storage or keep
From backup configuration. - Confirm the VM ID and optional bandwidth limit.
- Select
Unique,Start after restore, orLive restorewhen required. - Enable
Override settingsto replace the name, memory, cores, or sockets. - Select
Restoreand confirm the overwrite warning.
list shows name, notes, protection, date, format, and size.
These fields are loaded from the selected backup configuration and remain disabled until the option is enabled. An overridden VM name must be a valid DNS name containing only letters, numbers, dots, and hyphens.
Restore is submitted as a Proxmox background task. Its live progress appears in the task field of the status bar without blocking other work. Existing VM data can be overwritten because ServerAdmin uses the Proxmox force restore mode. Available options depend on the installed Proxmox version and storage type. The SSH account must have backup, storage-audit, VM allocation, and VM configuration permissions required by the selected action. Equivalent API permissions are required only when HTTPS fallback is used.
Create a new VM
Open Server actions > New VM and select:
Blank VM...to configure VM ID, name, boot options, ISO, guest OS,From backup...to select any available backup and restore it under the nextClone...to select an available source VM, target ID, name, clone mode,
graphics, machine, BIOS, SCSI controller, QEMU Agent, TPM, disk bus/device, cache, discard, IO thread, format, SSD, backup/replication flags, async IO, CPU, memory and minimum balloon memory, network model, MAC, bridge, VLAN, firewall, link state, rate, MTU, and multiqueue. The bridge is selected from interfaces reported by the Proxmox node. Leave MAC address as auto for automatic generation, or enter a MAC manually. Keep CPU type set to default to let Proxmox use its default CPU model.
free VM ID or another unused ID.
and optional target storage.
Creation and cloning run as background Proxmox tasks. Their progress appears in the task field of the status bar. The VM list refreshes after completion.
Recent actions
The Recent actions submenu stores the last 10 invoked commands. Server actions and VM actions have separate histories. Repeated commands move to the top instead of creating duplicates. The history persists between starts and replays an action against the currently selected server or VM.
View Proxmox task history
Open Server actions > Task history... to view the 50 most recent tasks on the server node. The modeless list shows start and finish time, task type, resource ID, user, and result. This is a static history snapshot. Refresh manually requests a new snapshot from Proxmox. The history window does not poll individual task logs and does not stop tasks. The search field filters the already loaded list without another server request. Task history uses pvesh through SSH/Pageant and therefore does not require a root@pam password while the SSH key is available.
6. VM Console
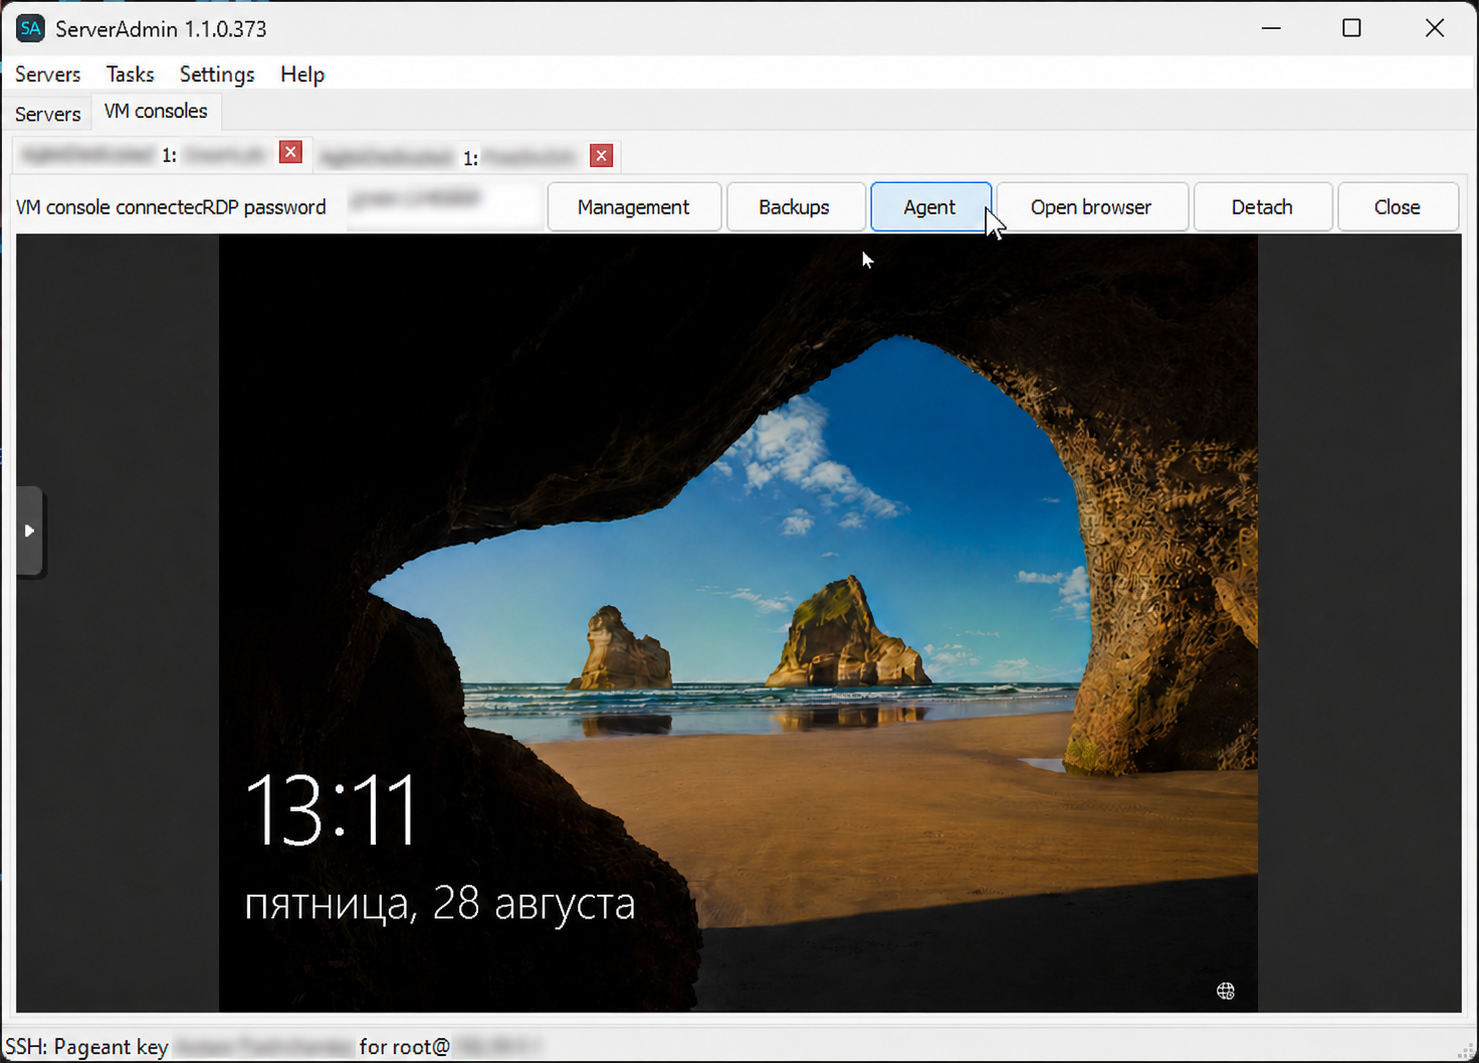
Open VM Console from the selected VM.
Managementis available directly on the console toolbar for VM lifecycleBackupsopens backup, restore, and active-task stop actions.Agentis available directly on the console toolbar and opens DevOpsTasksDetachmoves that console into its own window.Returnmoves it back into the main ServerAdmin window.- Each VM console has its own detachable window.
- Closing a detached window returns or closes its console safely.
actions. Commands run in the background and refresh only the target VM state.
operations.
If the embedded console cannot initialize, use its browser fallback action.
RDP, VNC, and SSH
The VM console toolbar shows the saved RDP password in plain text. The field is empty when ServerAdmin does not store RDP authorization for that VM.
The selected VM menu provides Remote access > RDP, VNC, and SSH (PuTTY) actions. ServerAdmin reads the guest IPv4 address through QEMU Guest Agent before launching a client. When the agent reports multiple usable IPv4 addresses, ServerAdmin asks which address to use. A single usable address is selected automatically. The selected address is saved for that server and VM. Later RDP, VNC, and SSH connections use it directly without requesting the address again. The latest non-empty remote-access address also becomes the shared VM address used by DevOpsTasks commands. An already saved RDP address takes precedence over the legacy shared address when an agent command starts. If automatic lookup fails for any reason, ServerAdmin asks for an address manually. The entered address can be saved for that server and VM and is used as the default value on later fallback prompts.
RDPuses the Windowsmstsc.execlient and the default RDP port3389.VNCusesclients\vnc\vncviewer.exefrom the ServerAdmin distribution andSSH (PuTTY)usesclients\ssh\putty.exeand the default SSH port22.- The corresponding RDP or VNC server must be enabled and reachable inside the
- QEMU Guest Agent must return a usable IPv4 address. VNC authentication is
On the first connection to a VM, ServerAdmin asks whether the RDP login and password should be stored in the application. If accepted, the password is protected with Windows DPAPI for the current Windows user. Before mstsc starts, ServerAdmin places the credential in the current Windows logon session; the password is never passed on the command line. If declined, authentication remains under normal Windows RDP control.
the default VNC port 5900.
The login and password are entered before connection. They can be saved for that server and VM; the password is protected with Windows DPAPI. When used, it is passed to PuTTY through a short-lived password file instead of the process command line.
guest operating system.
performed by the opened client. RDP credentials are stored by ServerAdmin only when the user explicitly enables this option.
Use Remote access > Connection settings... to change session monitoring or clear saved addresses and saved RDP or SSH credentials independently. Clearing RDP credentials also removes the session credential prepared for Windows Remote Desktop.
7. Install DevOpsTasks
Before installation, ServerAdmin checks:
- QEMU Guest Agent availability.
- Whether DevOpsTasks is already installed.
ServerAdmin transfers the packaged agent through Proxmox and installs it as a Windows service. Installation is skipped when the service is already present. Use Agent > Remove agent service to stop and remove the DevOpsTasks service through QEMU Guest Agent. If the service does not stop within 15 seconds, ServerAdmin terminates its process before deleting the service. The service is removed synchronously; its renamed installation directory is deleted by a detached hidden cleanup process. Bulk removals on one Proxmox server run one VM at a time. The SSH removal command is stopped after 45 seconds instead of waiting for interactive confirmation.
The VM must be able to execute PowerShell through QEMU Guest Agent. Select the agent SSH public-key file in ServerAdmin settings before installation. This user-specific authorized_keys file is not included in the distribution.
Manual DevOpsTasks installation
Use this method when QEMU Guest Agent installation is unavailable:
- From the ServerAdmin package, copy
agent\DevOpsTasks.payload.zipto the - Open PowerShell as Administrator and run:
Windows VM.
$Root = 'C:\Program Files\DevOpsTasks'
New-Item -ItemType Directory -Force "$Root\configs" | Out-Null
Expand-Archive .\DevOpsTasks.payload.zip $Root -Force
Copy-Item C:\path\to\authorized_keys "$Root\configs\authorized_keys" -Force
& "$Root\DevOpsTasks.exe" --install
Start-Service DevOpsTasks
Get-Service DevOpsTasks
authorized_keys must contain the public OpenSSH key matching the private key loaded in Pageant. Verify that TCP port 9023 is reachable from the Proxmox server. Do not publish this port to the Internet.
About DevOpsTasks
DevOpsTasks is a Windows administration agent installed in:
C:\Program Files\DevOpsTasksIts main components are:
DevOpsTasks.exe: the Windows service and remote administration API.DevOpsTasksDesktop.exe: an interactive-session helper used for desktopDevOpsTasks.json: agent configuration.DevOpsTasks.zip_crc: CRC32 marker of the installed release package.configs\authorized_keys: authorized SSH public keys.
operations such as screenshots.
The service runs with elevated rights and provides:
- PowerShell script execution and job status reporting.
- Windows service and process management.
- System, network, disk, and directory information.
- SFTP file upload and download.
- Desktop screenshots when
DevOpsTasksDesktop.exeis running in the logged-in
user's session.
The default ports are:
- TCP
9023: SSH and SFTP. - TCP
9024: WebSocket command API bound to127.0.0.1inside the VM.
ServerAdmin authenticates to port 9023 with the selected Pageant key, creates an SSH tunnel, and accesses port 9024 only through that tunnel. The WebSocket port does not need to be exposed on the VM network. Password fallback is disabled. When a VM has several IPv4 addresses, ServerAdmin probes TCP 9023 from the Proxmox host and uses the first reachable address. A saved RDP address does not override agent routing.
DevOpsTasks automatic updates
The DevOpsTasks service checks the public DevOpsTasks.zip_crc marker at startup and every four hours. If it differs from the local marker beside the service executable, the service downloads DevOpsTasks.zip, verifies its CRC32, stages the files, restarts itself, and completes replacement of DevOpsTasksDesktop.exe and documentation during the next startup.
Updates preserve DevOpsTasks.json, configs\authorized_keys, logs, and other local runtime data. A fresh ServerAdmin installation includes the current marker, so the agent does not download the same release immediately after installation.
ServerAdmin first uses the VM address saved for remote access. If no address is saved, it tries to discover one through QEMU Guest Agent. When discovery is not available, Desktop asks for the VM address and can save it. QEMU Guest Agent is therefore not required for commands executed by DevOpsTasks itself. The connection to DevOpsTasks is routed through the selected Proxmox server. Run via qm bypasses DevOpsTasks and executes PowerShell through QEMU Guest Agent instead.
Only install DevOpsTasks on trusted VMs. Anyone holding an authorized private key can perform privileged administration allowed by the agent.
Agent tools
The Agent menu in the VM list and VM console provides:
Agent status: verifies the connection and displays basic agent information.System information: displays Windows, network, and disk information as aProcesses: opens a nonmodal current process list.Startin the process list starts an executable with optional arguments.Stopforce-stops the selected process after confirmation.- The search field filters the loaded process list locally by PID, name, or
readable expandable tree. Save JSON... exports the original structured data.
path. Refresh explicitly requests a new list from the VM.
The process list remains open and refreshes after every start or stop attempt. Start requires the exact executable path and correct directory spelling, for example C:\Program Files\7-Zip\7zFM.exe. Windows paths are normally case-insensitive, so letter case is usually not significant. The process runs under the DevOpsTasks service account, normally LocalSystem, in session 0. GUI windows therefore do not appear on the logged-in user's desktop; use this action for background processes.
Services: opens the current Windows service list directly.- Service status and startup type are displayed as readable names.
- The search field filters the already loaded service list locally by system
Refreshrequests the current service list from the VM and updates theStart,Stop,Restart, andUninstallin the service list control theInstallin the service list installs an automatic Windows service from an
or display name without sending another VM request.
existing window.
selected Windows service.
executable path.
The service list remains open during service operations. After every attempt, including a failed command, ServerAdmin refreshes that same list. The list is modeless, so detached VM console windows remain usable while it is open.
Screenshots > Desktop: downloads and opens the interactive WindowsScreenshots > Window by title...: captures the first window whose title
desktop.
contains the entered text.
JSON responses in list and information views are formatted with indentation by the result window immediately before display. Process and service results use tables, support sorting by column headers, and can be saved as JSON. When a screenshot is requested, ServerAdmin starts DevOpsTasksDesktop.exe in the logged-in user's session if the helper is not already running. The helper starts with its console hidden. The saved file path is shown in the ServerAdmin status bar. By default, screenshots are saved beside ServerAdmin.exe under:
screenshotsChange the folder under Settings > Application settings... > Screenshot directory. Relative paths are resolved from the directory containing ServerAdmin.exe.
8. Run PowerShell
- Select a Windows VM.
- Open
Agent > Send command. - Enter PowerShell code or load an existing
.ps1file. - Leave
Run via qmdisabled to use DevOpsTasks. - Clear
Run in desktop sessionto receive live command output. - Keep
Run in desktop sessionselected only for programs that must appear - Enable
Run via qmonly when the agent route is unavailable. - Select
Run.
on the logged-in user's desktop.
While DevOpsTasks emits job.output events, the upper VM console appends each output chunk immediately instead of waiting for job.result. The progress window only indicates that the command is still running. Select Cancel in the progress window to send job.cancel; DevOpsTasks then stops the PowerShell process and writes Command cancelled. to the VM console.
Agent mode uses Pageant key authentication and does not allow password fallback. Direct commands run under the DevOpsTasks service identity in session 0 and provide live output. Desktop-session commands run with elevated rights as the logged-in Windows user, return after submission, and do not provide the child process output.
Successful command submission is silent. ServerAdmin shows a dialog only when the command cannot be submitted or the agent reports a failure.
9. Send a File
- Select a Windows VM.
- Open
Agent > Files > Send file.... - Select a local file.
- Confirm or change the destination path.
- Enable
Send via qmto use QEMU Guest Agent instead of DevOpsTasks SFTP.
The default destination is under C:\Temp. ServerAdmin transfers the file directly through DevOpsTasks SFTP over the Proxmox SSH tunnel.
To download a file:
- Open
Agent > Files > Receive file.... - Enter the Windows source directory.
- Select one or more files from the directory list.
- Select the local destination folder.
ServerAdmin downloads only the selected files and preserves their original names. Both operations follow the filesystem roots configured in DevOpsTasks.
To change those roots:
- Open
Agent > Files > Allowed folders.... - Enter one allowed Windows folder per line, or enable
- Select
Save.
Allow all local drives.
Unrestricted drive access should be enabled only for trusted VMs and administrators.
10. Web Interface
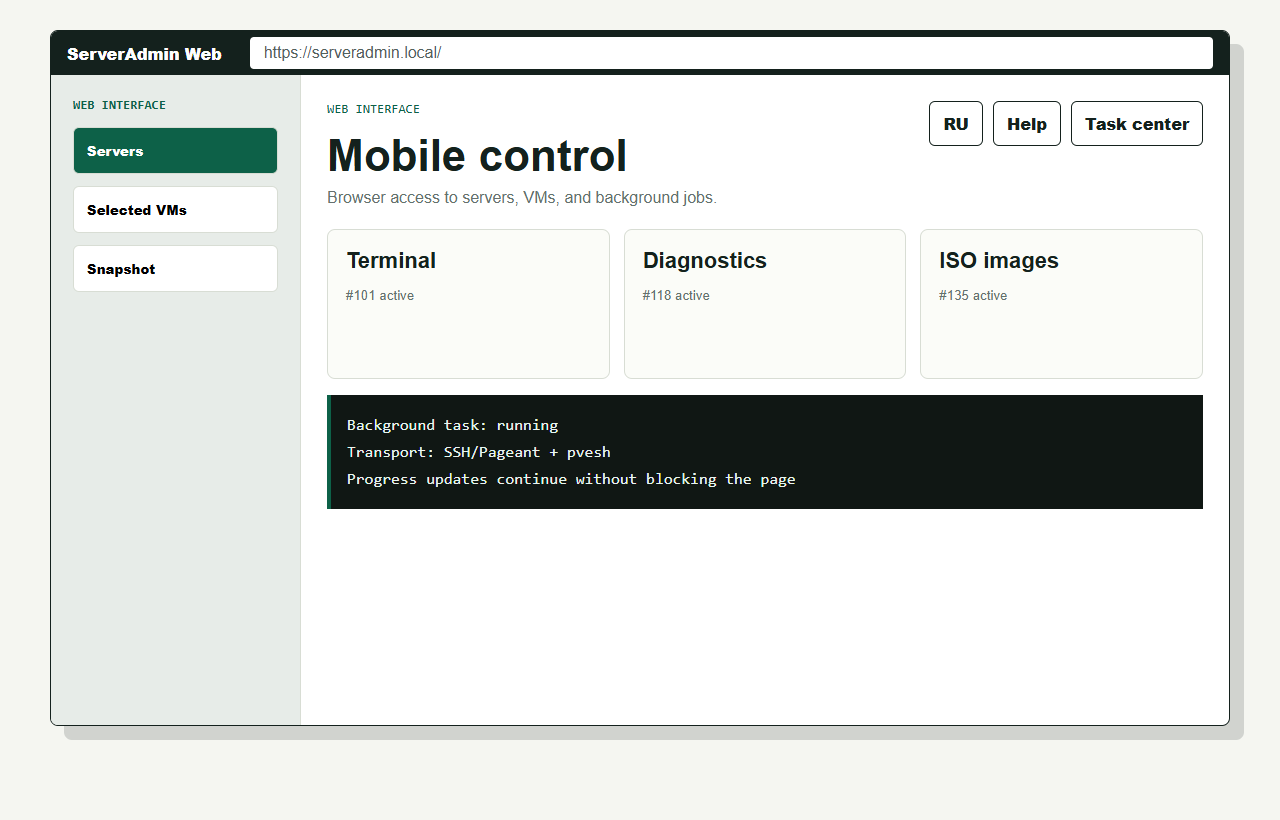
Open Settings > Application settings... to configure:
- Enable or disable the web interface.
- Bind address and port.
- Authentication requirement.
- User name and password.
- Allowed client IP addresses and networks.
- File logging level.
Authentication is mandatory when binding to a non-loopback address.
The default address is:
http://127.0.0.1:8088/Use CIDR notation for networks in the allowlist. Example:
127.0.0.1,::1,192.168.88.0/24The web interface provides server management, VM actions, VM hardware editing, agent installation, and VM consoles. Native VM terminal access is available only in the desktop application.
Web users, roles, and audit
The first configured Web account is migrated to the shared user store as an administrator. Manage accounts in Desktop through Settings > Web users... or, as an administrator, through Users in the Web header.
administratorcan change servers, users, schedules, and all operations;operatorcan operate assigned servers and VMs but cannot change users orviewercan only read assigned server state and history.
server definitions;
Set Servers to * or a comma-separated list of exact ServerAdmin server names. An empty scope grants access to no server. Passwords are stored only as salted verifiers in data\web_users.json; plaintext passwords are never stored. The Web header shows the active account and role.
Settings > Web audit... and the administrator-only Web Audit button show the bounded action log. Both views support filtering and JSON export. The log records login, permission, configuration, command, task, cancellation, and result events without storing passwords, private keys, or command/script text. The file is data\web_audit.json and keeps at most 5000 newest events.
Use the separate Hardware button in a VM row to open hardware settings. The web editor lists every configured SCSI, VirtIO Block, and SATA disk and every network adapter. It can add or remove disks and adapters in one save operation. New disks require a bus, device number, image storage, and size. New adapters require a model and bridge; enter auto for an automatically generated MAC address or enter a MAC address manually. Existing disk size can only grow.
The blank-VM wizard uses the same node CPU-model list and selects default for new VMs. With default, the cpu property is omitted from the create request. Use Tasks in the selected server panel to open the same recent Proxmox task history with local search and explicit refresh. Use Terminal to open a server SSH command window. Enter one non-interactive command at a time; its complete output appears in the same window. Each command runs independently with the SSH identity configured for that server. The button is hidden in the mobile layout. Terminal access permits arbitrary server commands, so expose the web interface only to trusted administrators. Enter clear in the Desktop or Web terminal to clear its current output locally. The Desktop server terminal opens a dedicated SSH connection in a worker thread, so bulk operations can continue on the same server without blocking the application interface. Its connection phase is not queued behind the serialized bulk-operation connections. The terminal prints connecting... immediately and resolves the target workspace again before displaying the result, so closing or replacing a server workspace cannot leave a stale UI callback.
The terminal's Saved commands list uses the same command library as Server actions > SSH command in the desktop application. Selecting an item copies it into the command field. Enter a command and choose Save command to store a name and an optional confirmation requirement. Desktop reloads this shared list whenever its Server actions menu opens. Use the desktop Configure... command to edit, reorder, or delete saved items. Legacy Disks and RAID saved commands are upgraded automatically to portable short variants accepted by the embedded SSH terminal. Disks uses portable lsblk columns; RAID reads the Linux software RAID state from /proc/mdstat. Refresh snapshot starts parallel background SSH checks for the configured servers. It does not query VM state or replace cached VM lists. One slow or unavailable server does not delay checks for the other servers. The same lightweight server checks start automatically when the Web dashboard opens; pressing Refresh snapshot runs them again manually. Load VMs from server persists the received VM list in ServersList; the same cached list is restored after restarting the desktop application or the background service. Check VM states refreshes status, name, configuration, and Proxmox lock only for VMs already present in that cached list. It runs in the background and persists the updated list. Use Clone server... in a server submenu under the top Servers menu to copy its connection settings. The copied name receives the (copy) suffix. Change the server name and host or IP, then save the new definition. The original server is unchanged.
The web server header has the same Clone action beside Edit. It copies the ports, user, and stored password; change the name and host or IP before saving.
Web VM and server control commands run as independent background tasks. Starting or stopping one VM does not disable the remaining server and VM controls.
Use the top-level Tasks menu in Desktop or Task center in the Web header to view current active background operations. Completed, failed, and canceled tasks are not shown in this list. The view shows action, server, target, current state, timestamps, result, error, and bounded task output. Progress is not shown in the list. Select a task to inspect its current status and output. Search is local and does not contact a server. Automatic refresh changes only rows whose data changed, so selection remains stable. Stop is enabled only for an active task that supports cancellation. Clear completed removes only completed, failed, and canceled history. Active Web operations are read from the optional background service when it is enabled; otherwise they remain in the Desktop process. Task history is stored under the local data directory. Operations interrupted by a process restart are retained and marked as failed.
Server and VM monitoring are separate. Use Server actions > Monitoring... or the Web Monitoring button for node availability, CPU, memory, storage, ZFS, and SSH. Use Monitoring... in a VM action menu or the VM row Monitoring button in Web for that VM's status, CPU, memory, and disk usage. Monitoring runs independently from Refresh snapshot.
Each server and each VM has its own polling interval and monitoring duration. Start begins the bounded session; Stop ends it. With Continue monitoring in background, the job service continues polling after Desktop or the browser dialog closes. Without it, polling continues only while that monitoring window remains open. The minimum interval is 30 seconds. Rows at or above a configured threshold are highlighted yellow. A value ten percentage points above that threshold, capped at 100%, is critical and is highlighted red. The same indication is used for server metrics, VM metrics, and incidents in Desktop and Web. In Desktop server and VM monitoring windows, drag the horizontal separator between the current readings and incident tables to resize either part vertically.
Each VM monitoring window shows only its selected VM. Enable Log VM readings to CSV to append every monitoring sample to a semicolon-delimited UTF-8 CSV file. The default folder is monitoring\vm-history beside ServerAdmin.exe; a different folder can be configured per VM. Desktop Open history opens that folder. Web Download VM history downloads that VM's accumulated CSV for direct Excel import. The file has one row per VM and sample time. Server monitoring can be recorded independently with Log server readings to CSV. Its default folder is monitoring\server-history. Each sample contains availability, CPU, memory, SSH state, overall severity, and one row for every storage. Desktop opens the configured folder; Web downloads the accumulated CSV directly. Clear Enable warning notifications to keep collecting and displaying warning metrics without creating warning incidents, writing warning alerts to the log, or sending warning webhooks. Critical incidents and notifications remain active. This setting is shared by Web and Desktop; an open Desktop monitoring window reloads changes saved in Web. Existing incidents remain in history and are not removed when notifications are disabled. Manual Refresh now is asynchronous and appears in the task center. The latest snapshot and up to 200 incidents are stored under data; unfinished checks are handled like other background tasks. Incidents record severity and check time and can be acknowledged from either interface.
A monitoring refresh has its own background slot. It does not lock the server workspace or disable Web and Desktop actions. Repeated refresh requests for the same server are ignored until the current monitoring request finishes. Short Bounded request handling prevents an unavailable Proxmox endpoint from leaving monitoring permanently active.
Monitoring reads node, storage, VM, and ZFS metrics through pvesh over SSH/Pageant. The HTTPS API is used only as a fallback. The SSH indicator uses only a three-second TCP endpoint probe; it does not open an authenticated SSH session or run zpool commands.
When the background service is enabled and running, it owns scheduled checks, including while the Desktop UI is closed. If the service is unavailable, an open Desktop process runs them locally. Non-OK transitions are written to the local log. When a webhook is configured, ServerAdmin sends the normalized JSON snapshot and records delivery failures as separate task-center entries. The webhook URL is returned only by the authenticated settings endpoint and is not included in normal server snapshots or logs.
11. Group Operations
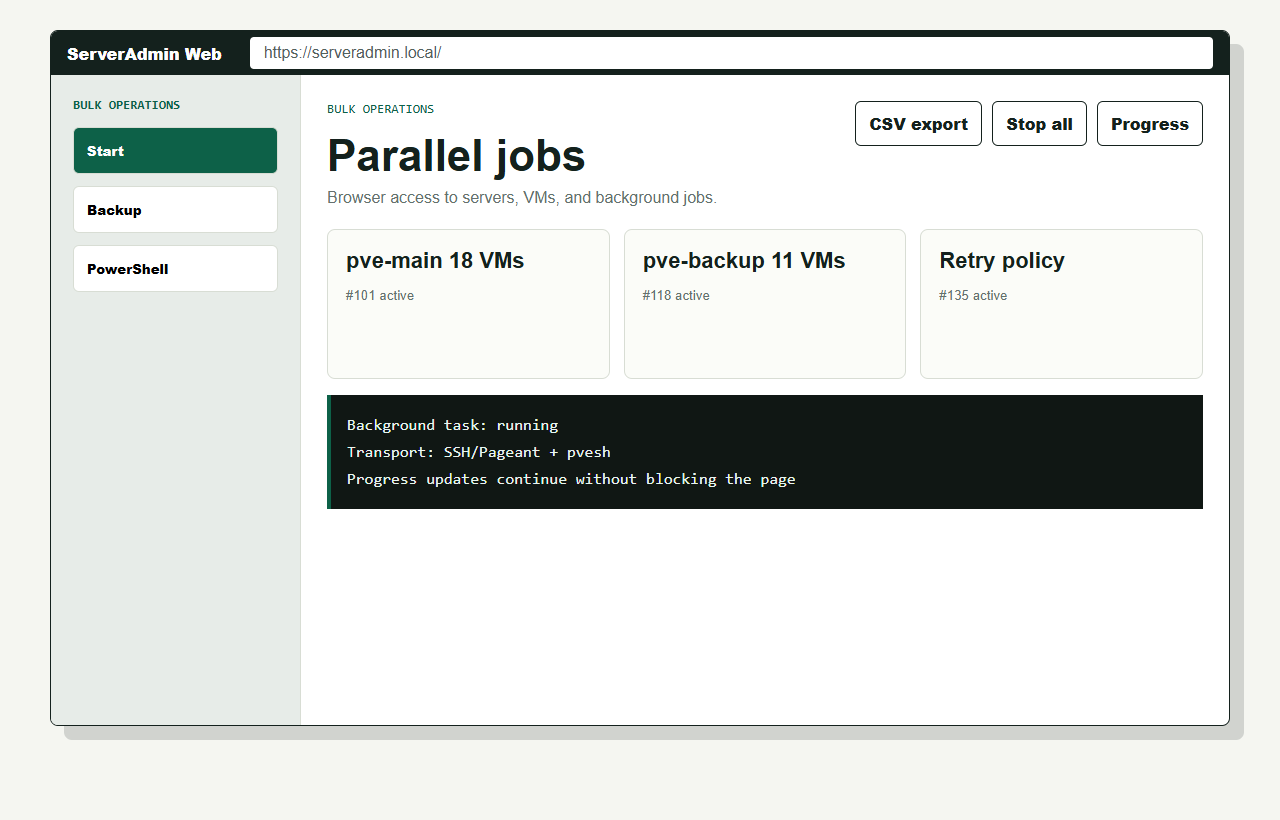
Group operations are shared Desktop and Web workflows. They are not tied to one interface and use the same background task coordinator and result model.
Bulk VM operations
Use Bulk actions in a Desktop server workspace or the Web server toolbar. Use Select all or Clear all to change the entire loaded VM list, or select individual VMs. Choose Start, Shutdown, Stop, Reboot, Backup, PowerShell, Check QEMU Agent, or Check DevOpsTasks, and set parallel operations from 1 to 8. The QEMU check requires a successful guest-agent ping. The DevOpsTasks check is separate: it runs only for VMs whose Proxmox OS type is Windows and connects directly to the saved VM IP on DevOpsTasks port 9023. It does not call QEMU Guest Agent. Save a remote-access IP for the VM before running this check. The first DevOpsTasks installation still uses QEMU Guest Agent to transfer and start the installer inside Windows.
Every grouped operation has a common SSH execution policy. SSH timeout limits each SSH request, Attempts controls how many times a transient SSH or QEMU transport failure is tried, and Retry interval sets the pause between attempts. Defaults are 90 seconds, 3 attempts, and 5 seconds. The policy applies to grouped server operations and grouped operations for VMs. Backup also requires a Proxmox storage and mode. PowerShell can run through the DevOpsTasks agent or through qm and can optionally target the desktop session. Enable Save result to file to store each PowerShell result. The default directory is results\powershell beside ServerAdmin.exe; missing directories are created. Names use SERVER_VM-ID_COMMAND_DATE.txt. A desktop-session command has no captured child-process stream, so its file contains the task scheduling response. In Web, select VMs with the checkboxes in the first list column. The button is available when the list contains VMs and reports a clear selection prompt when none are selected. For Backup, the storage field is loaded from enabled Proxmox cluster storage configurations that support backup content; free-text storage names are not accepted.
A bulk operation has its own background slot and does not lock the server workspace. Other server and VM commands remain available while it runs. Only one bulk operation per server can run at a time.
If an all-VM operation finds no cached VM list, ServerAdmin loads the list from that Proxmox server in the background, saves it, and then starts the per-VM operations. Agent availability checks are serialized per server and use isolated SSH/Pageant sessions, so a check cannot corrupt an interactive terminal session. An unavailable QEMU Guest Agent check terminates by timeout instead of staying in the running state indefinitely.
One parent task and one child task per VM appear in the task center. Child failures do not stop other VMs. The parent shows aggregate progress and result. The separate bulk-results window refreshes while the operation is active. Use Stop all, or Stop in the task center, to stop pending work and supported active backup or agent commands. Cancellation interrupts retry delays immediately; a currently active network request finishes or reaches its configured SSH timeout before its row changes to canceled. Click any results-table column header to sort by that column; click it again to reverse the order. VM IDs use numeric order. Use Save CSV... in Desktop or Download CSV in Web to export all currently displayed per-server and per-VM statuses and full result text to a UTF-8 CSV file. Each object occupies one row with generated time, batch, server, VM, operation, status, and result columns. The semicolon-delimited file imports directly into Excel. Multiline results are joined with | . The export is available for every group-operation type, including unfinished and failed operations. Use Retry on a finished parent while the owning Desktop or service process is still running. Retry data is intentionally kept only in memory because a PowerShell payload may contain sensitive values.
Bulk server operations
Use Servers > Bulk server actions... in Desktop or Bulk server actions above the Web server workspace. Use Select all or Clear all to change the entire list, or select individual servers, then choose the target:
Selected serverssends an SSH command, shutdown, reboot, or forced rebootAll VMs on selected serversstarts, shuts down, stops, or reboots every VM
to each selected Proxmox host.
in each selected server's cached VM list. It can also install or remove DevOpsTasks, stop active backup/restore tasks, run a PowerShell command strictly through DevOpsTasks, upload or download one file through agent SFTP, collect system information, and check QEMU Guest Agent or DevOpsTasks availability on every cached VM.
For an SSH command, enable Save result to file to keep each server response. The default directory is results\ssh beside ServerAdmin.exe; missing directories are created. Names use SERVER_COMMAND_DATE.txt. For PowerShell on all VMs, the default is results\powershell, with one SERVER_VM-ID_COMMAND_DATE.txt file per VM.
For agent upload, specify the local source file and destination directory in the VM. ServerAdmin creates the directory and preserves the source file name. For download, type the full remote file path and select an output directory. Downloaded names use SERVER_VM-ID_DATE_ORIGINAL-NAME, so files from different VMs cannot replace each other. System-information collection writes one JSON file per VM using SERVER_VM-ID_DATE.json. Relative local paths are resolved beside ServerAdmin.exe. When Web or the background service runs the operation, local paths refer to the ServerAdmin host, not the browser PC.
Each selected server receives an independent background task. Transient SSH failures follow the timeout, attempt count, and retry interval entered in the group-operation form. After the final attempt, the operation is marked as failed in the result list. A failure on one server does not stop the others. Desktop and Web open a separate live result window with the state and result of every affected server or VM. Results and cancellation are also available in the task center. Load each server's VM list before using the all-VM target. Web role and server-scope permissions are checked separately for every selected server. PowerShell retains the existing Run via qm and desktop-session options. Agent command also supports desktop-session execution. Desktop-session work is registered as a short-lived scheduled task and returns after scheduling.
12. Backup Schedules
Open Backup schedules from the Desktop server menu or Schedules in Web. The editor reads and writes native cluster-wide Proxmox vzdump jobs. Each job contains VM IDs, target storage, backup mode, a Proxmox calendar expression such as mon..fri 22:00, retention count, and enabled state. The convenient form daily HH:mm is normalized to the equivalent Proxmox daily time. The Desktop storage selector loads enabled backup-capable storages from Proxmox.
Proxmox stores and executes these jobs on the server. ServerAdmin and its background service do not need to remain running. Retention is saved as the native keep-last pruning option. Refresh reloads the current server job list. The Web schedule list and editor scroll independently when they do not fit the available browser height.
13. Templates and Cloud-Init
Use New VM > From template / Cloud-Init in Desktop or Templates in Web. ServerAdmin loads QEMU templates, image and snippet storages, resource pools, bridges, CPU models, and the next free VM ID directly from Proxmox. Select a template and configure the VM name, Cloud-Init user, SSH public key, IPv4/DHCP, gateway, DNS, optional user-data snippet, disk growth, CPU, memory, and startup.
Cloud-Init is the guest operating system's first-boot configuration mechanism. It applies the requested user, SSH public key, IP settings, gateway, and DNS inside a compatible template. The template must contain Cloud-Init support and a configured Cloud-Init drive. The SSH field accepts an OpenSSH public key; it does not accept a private key or a Pageant key reference.
Provisioning runs in the background task center. It performs a full clone, waits for Proxmox, applies Cloud-Init and hardware values, optionally starts the VM, and refreshes only the created VM in the local cache. Cancel stops the active clone when Proxmox permits it. Retry data remains only in process memory. Cloud-Init form values are not persisted, exported, or written to logs. Saved Proxmox credentials continue to use the existing DPAPI protection.
14. VM and Disk Migration
Use Server actions > Migrate selected VM... in Desktop and select the source VM in the displayed list, or use Migrate beside a VM in Web. Choose full VM migration or movement of one virtual disk. Full migration supports online and offline modes, destination node, and destination storage. Disk movement selects a disk and can retain or delete its source copy. The target storage must differ from the selected disk's current storage.
Before submission ServerAdmin rejects active locks, host PCI/USB/direct-device resources, unavailable destination storage, an invalid online state, and insufficient free space. The Proxmox task runs asynchronously with progress and log output in the task center. Cancel requests Proxmox task termination. After completion ServerAdmin refreshes the affected VM, including its current node.
15. Diagnostics and Support Bundle
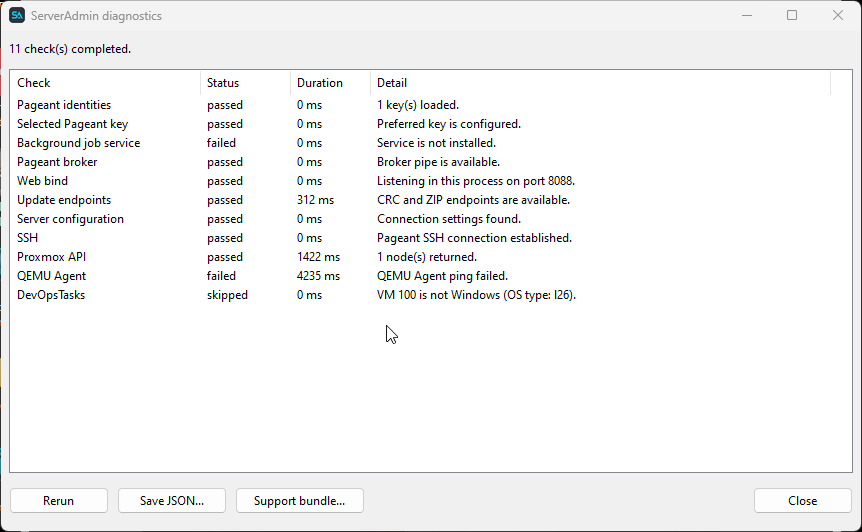
Open Settings > Diagnostics... in Desktop or Diagnostics in the selected server toolbar in Web. When a server is selected, ServerAdmin checks Pageant identities, the preferred key, background service, Pageant broker, Web bind, update endpoints, SSH, Proxmox API, QEMU Agent, and DevOpsTasks. Without a selected server, remote checks are shown as skipped. In Desktop, the Web bind check accepts either the listener hosted by the Desktop process or the listener hosted by the running background service. Starting diagnostics again clears the previous Web result table immediately and shows the running state until the new report is ready.
Checks have independent limits. The Proxmox API check allows up to 30 seconds; the remaining checks normally allow 10-15 seconds. A failed or timed-out check does not suppress other results. Rerun repeats the workflow. Desktop and Web can export the sanitized JSON report. Desktop can additionally create a support ZIP containing the report, version information, and at most 1 MiB from the newest sanitized log. Passwords, tokens, authorization values, and private-key blocks are redacted. Review the bundle before sending it outside your organization. The version.txt entry contains the exact version of the executable that created the bundle. Redaction also covers stored password verifiers, Pageant key blobs, cookies, CSRF values, API keys, and explicitly labelled secrets.
16. Automatic Updates
ServerAdmin downloads the small ServerAdmin.zip_crc text file after startup. The file contains the unsigned decimal CRC32 of the published ServerAdmin.exe. When it differs from the CRC32 of the installed EXE:
- Confirm the update.
- Wait for the package download and validation.
- ServerAdmin replaces its executable and restarts.
- The new process applies the remaining runtime files before opening the UI.
When the background job service is running, the updater stops it before replacing runtime files and starts it again after the update. A stale ServerAdmin_old.exe that is still locked does not prevent startup and is removed on a later run.
Use Settings > Check for updates... for a manual check.
Use Check now beside the automatic-update checkbox to start a manual background check.
Clear Check for updates automatically under Settings > Application settings... to disable startup checks. Manual checks remain available.
Executable CRC is the only update identity. ServerAdmin offers an update regardless of whether the published EXE version is higher, equal, or lower. The ZIP is downloaded only after the user accepts the update. After extraction, the CRC32 of its ServerAdmin.exe must match ServerAdmin.zip_crc.
package_serveradmin.bat creates both dist\ServerAdmin.zip and dist\ServerAdmin.zip_crc. Publish both files in the same server directory. Do not edit the CRC file manually. A fresh installation does not download the ZIP when its EXE matches the published CRC.
Downloaded and extracted update files are stored beside ServerAdmin.exe under updates. The directory is removed after a successful update.
Updates preserve:
confServersListFS- Logs
agent\authorized_keys
Do not interrupt Windows while ServerAdmin is replacing files.
17. Logging
ServerAdmin writes daily UTF-8 logs to:
logs\ServerAdmin_YYYYMMDD.logSelect the level under Settings > Application settings...:
Normal: application startup, update decisions, important security events,Debug: all normal entries plus detailed update stages, paths, network and
completed update stages, and errors.
SSH workflow diagnostics, web requests, VM operations, and user actions.
The selected level is applied immediately and stored in conf\SASettings.ini under [LOGGING].
Debug logging records action metadata but does not intentionally record passwords, private keys, or PowerShell script contents. Review a debug log before sending it to another person because it can contain server names, IP addresses, user names, and local file paths.
For an update problem, search the log for Update. The log records remote and installed CRC values, installed and published versions, download and validation results, user approval, activation, restart, and pending-file application.
18. Runtime Data and Backup
conf\SASettings.inicontains settings and encrypted credentials.ServersListcontains the local server cache.FScontains SSH host key and runtime data.agent\authorized_keyscontrols DevOpsTasks SSH authorization.
Passwords are protected with Windows DPAPI. They can be decrypted only by the same Windows user on the same computer.
Back up the complete ServerAdmin directory while the application is closed. Do not copy encrypted credentials to another Windows user profile.
Portable server and VM data exchange
Use Settings > Server and VM data transfer to move saved server and VM data between ServerAdmin installations:
- Select
Export server and VM data..., choose a.sacfgfile, and enter the - Use a password of at least 12 characters. It cannot be recovered.
- On the destination installation, select
Import server and VM data..., choose - Restart ServerAdmin after a successful import.
password twice.
the file, confirm replacement, and enter the export password.
The authenticated encrypted file contains application settings, server and VM cache, saved Proxmox, VM SSH, and optional VM RDP passwords that can be decrypted on the source computer, Web users, and backup schedules. Credentials are decrypted only in memory, encrypted in the transfer file with AES-256-GCM, and protected again with Windows DPAPI during import. Key derivation uses PBKDF2-HMAC-SHA256 with a new random salt for every export.
Import replaces the included configuration files. Before replacement, ServerAdmin stores the previous local DPAPI-protected files under config-backups\YYYYMMDD_HHMMSS. Logs, task history, monitoring history, private keys, and SSH host-key cache are not exported. Losing the transfer password makes the .sacfg file unusable.
19. Troubleshooting
Pageant authentication failed
- Start Pageant.
- Load the correct private key.
- Verify the matching public key is authorized on Proxmox and in
- Select the key again through
Settings > Pageant keys....
agent\authorized_keys.
VM address cannot be detected
- Verify QEMU Guest Agent is installed and running inside the VM.
- Verify Proxmox can execute
qm agent <VMID> network-get-interfaces.
DevOpsTasks connection failed
- Verify the DevOpsTasks service is running in the VM.
- Verify TCP port
9023is reachable from the Proxmox host. - Verify the selected Pageant key is authorized by the agent.
PowerShell command failed
- Confirm the command is valid PowerShell.
- Confirm an interactive Windows user is logged in for agent mode.
- Retry with
Run via qmwhen interactive execution is not required.
Web interface is unavailable
- Verify the web interface is enabled.
- Verify the bind address and port.
- Verify Windows Firewall permits the configured port.
- Verify the client IP matches the allowlist.
Update failed
- Verify HTTPS access to
download.agbis.co. - Verify the ServerAdmin directory is writable.
- Enable
Debuglogging and inspect the newest file underlogs. - Compare the remote and installed CRC entries in the log. Any different
- Close other ServerAdmin instances and retry through
published package must be offered regardless of EXE version.
Settings > Check for updates....